
Yikes! Halloween is less than three weeks away and I haven’t even started on my steampunk costume yet.
If this is you, fear not. It’s not impossible to make a passable steampunk pistol prop in only a couple of days. A few years ago, my son wanted to dress steampunk for Maker Faire. We put together a reasonable outfit (He already owned goggles…), but he wanted a pistol to top it off, and Maker Faire was only a few days away.
Fortunately, I had found this water pistol recently at a dollar store.
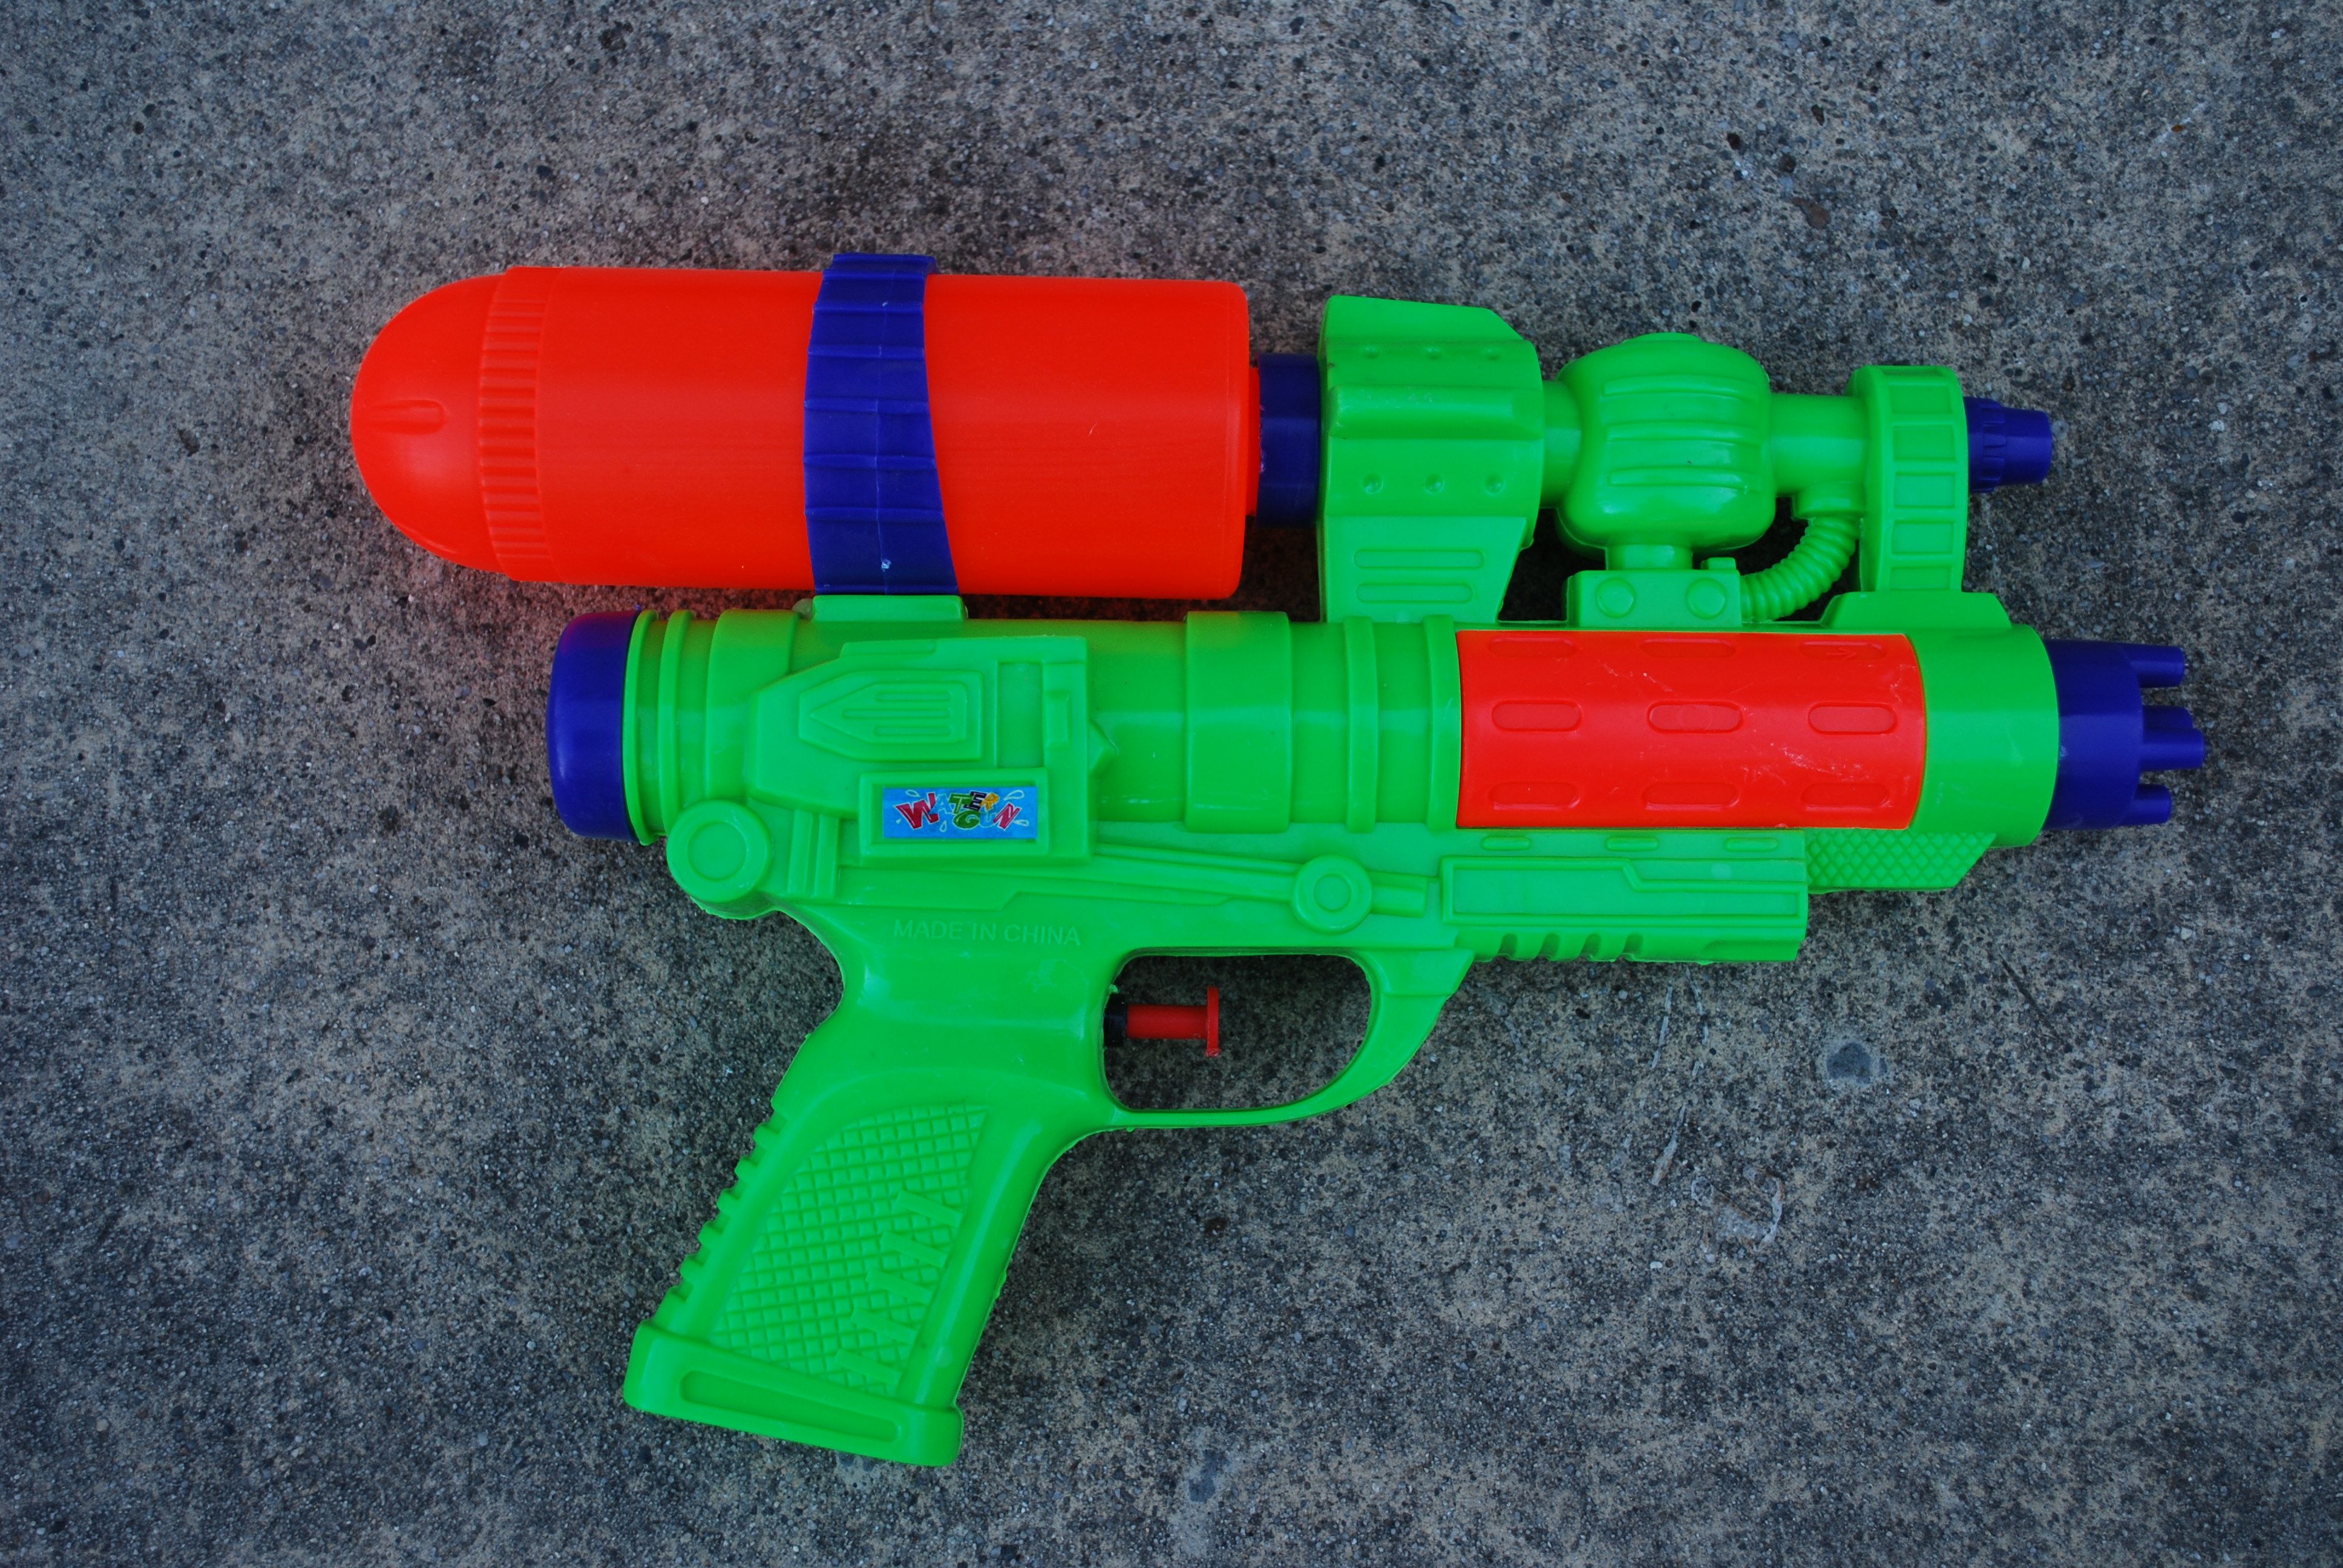
Water pistol before…
I know. I’m sorry–the colors are not so tear-inducing in real life, but close. I will show you how to change this garish monstrosity into a steampunk pistol. If you look past the eye-throbbing colors, you can see that this pistol actually has pretty good details molded into it–a water tank (the large red bit), fins, a smaller tank, tubing, rivets, etc. So, I lucked out and found one that was easily adaptable to begin with. If you’ve got the time, look around at dollar stores, thrift shops, flea markets, second-rate toy stores, etc., for a pistol you can imagine as steampunk–with a little work. If not, just about anything can be made to look steampunk–or at least, more steampunk–with judicious application of paint.
Yes, paint. For this mod, we’re not going to use anything more drastic than paint. We want to change the Las Vegas neon colors into the dark, metallic palette of Steampunk. First step–prepare the surface. Cheap plastic could have any manner of mold-release agents, surfactants, or grease on the surface that will prevent paint from adhering well. A wipe with a rag soaked with a little alcohol will help, but sanding with very fine grit sandpaper is better. Try to sand as much of the surface as possible. If there are logos or brand names molded into the plastic that you don’t want to show in the final product use coarser grit paper and knock them down. Fortunately, in this project there was only a model number and a very small “Made in China” that I didn’t bother with. Nerf guns, which are very popular for modding, require more work to sand out the logos.
The next step is to spray the entire thing with black spray paint–gloss or flat is your option. I used gloss because I knew that I’d be leaving some black showing. It’s better if you can use a paint specifically made for painting plastic (Krylon and Rustoleum are US brands that have spray paints made for plastic.) But if you have regular spray paints, don’t sweat it. Make sure you paint the entire surface (unless you specifically want some of the seizure-inducing neon color to show in places).
Once dry, now is the time for artistry! You now have a blank, black slate. Picture what sections would look best in which color. We’re working in the steampunk aesthetic here, so think black, dark brown, dark metallics. At this point, you have two potential painting methods to use: spray or brush. It’s not one or the other either; I used both in this project. Spraying obviously works best for large areas (like the water tank) or places where you can mask off adjacent areas. For small detailed areas, brushing works better than spraying. If you want to brush on the same color as you spray painted, just spray some of the paint into a small cup and brush from that. So, I used “copper” for the tank and some other smaller areas, a “hammered bronze” paint for the grip and part of the barrel, and some gold leaf paint I had for “brass” for a few highlighted areas. As mentioned above, I left some areas black as well. To finish it off, I used silver and gold metallic Sharpie pens to draw some Victorian filigree on the tank. (You can also use the Sharpies to directly paint small, detailed areas–I love colored Sharpies!) You can see the final result below.
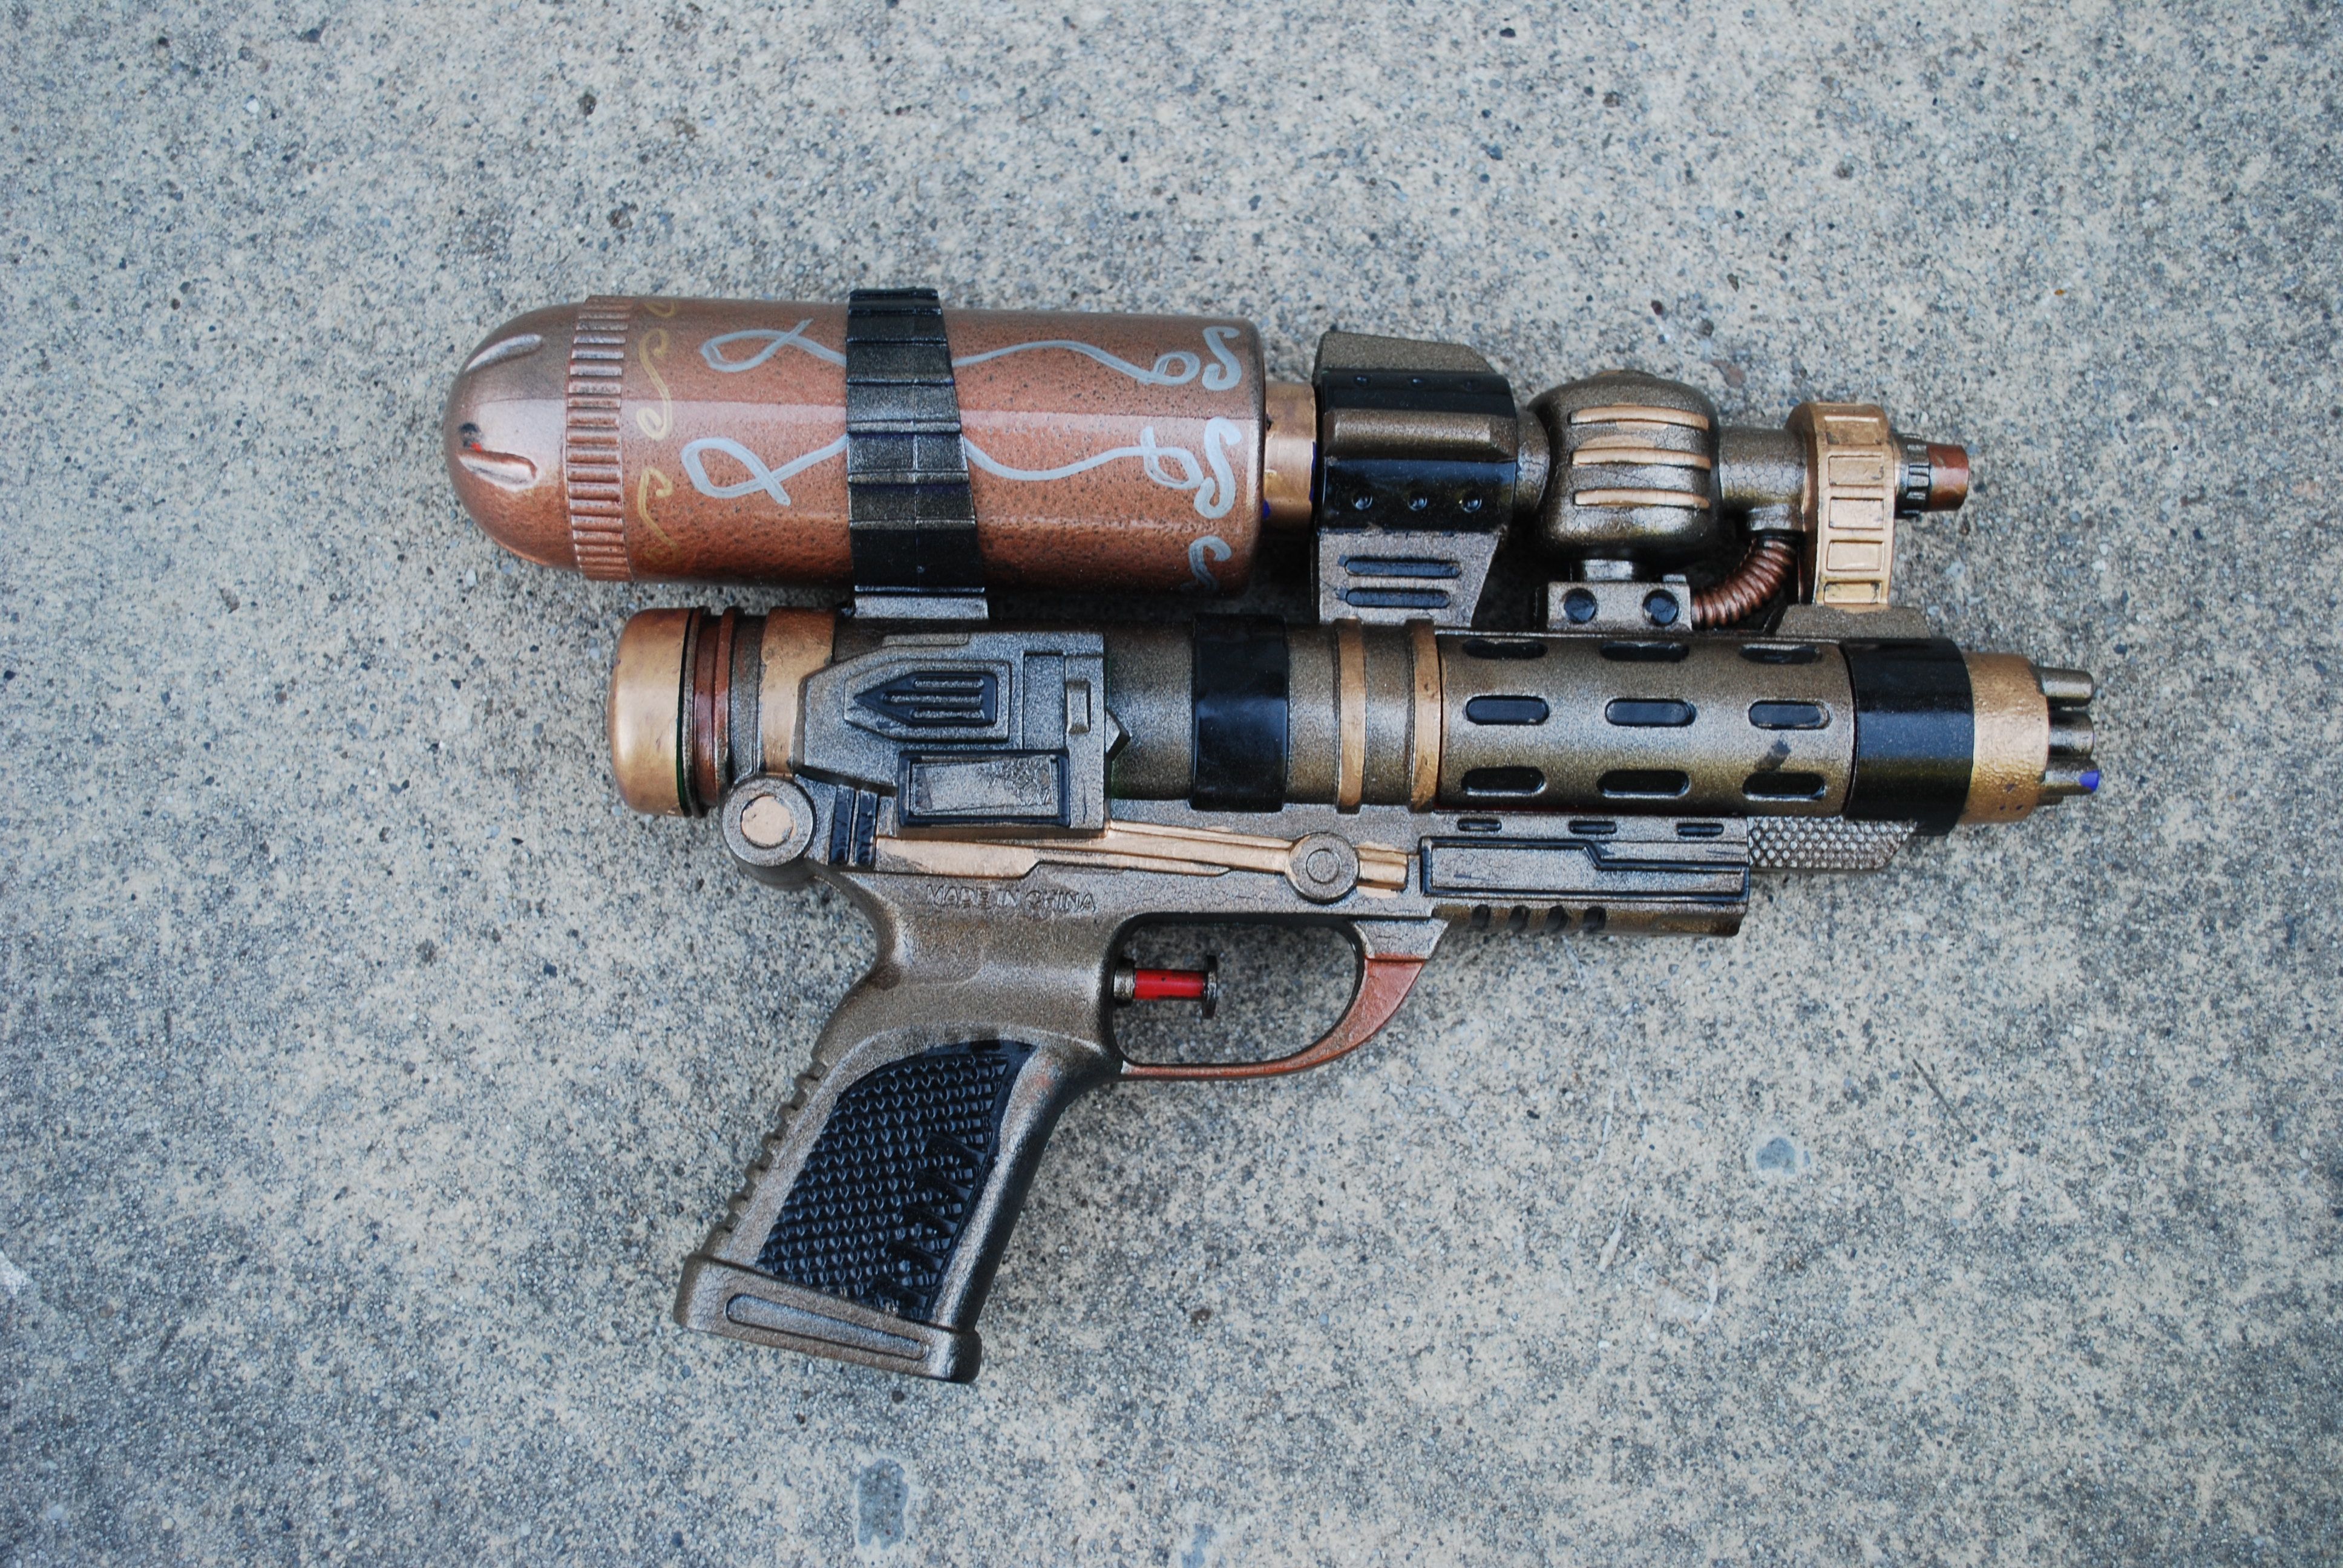 Not bad for a couple nights’ work, I think. Interestingly, I have since found an almost identical pistol that was modded in this book (p. 292, if you have it). The one difference is that they replaced the water tank with a large vacuum tube. Very cool! (Oh, hey, I found it on Pinterest here!)
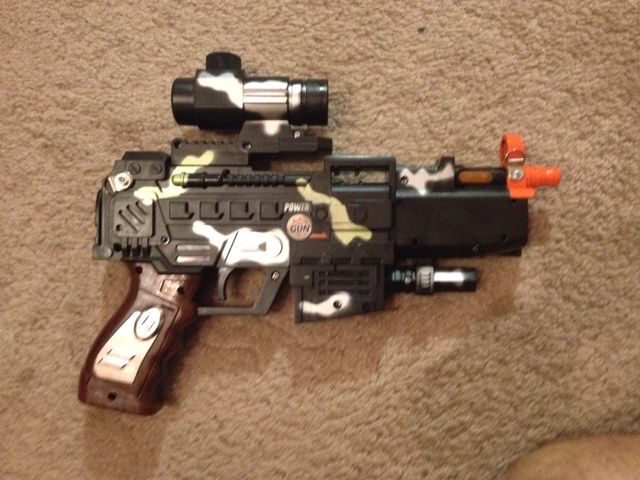
Small water pistols make great derringers. I’ve made one for my wife, but I’m not happy with it, so I’m trying again. (Too much coffee that day gave me shaky hands and thus, messy paint, I think.) My next large pistol project may be the one below which was a 99 cent thrift store find. I like it because it lights up upon firing and the sound chip still works so it makes a satisfying pew-pew sound.
My next pistol project?
I also have a plastic flintlock that would, with some modifications, make a suitable weapon for an airpirate.
I’ve only touched the surface of the possible techniques that can be used to steampunk-ify a cheap plastic toy gun, as I was concentrating on getting a reasonably good job done quickly. Just search something like “steampunk plastic pistol” online, and you will get lots of ideas. There are also some good tutorials on Instructables and other places. I found Diana Vick’s informative. This one is also good.
I should note here that there is a small minority in the steampunk community who pooh-pooh plastic props as “not period”. To them, I would just ask which part of our imagination-driven steampunk culture needs to be “period”, and to please proffer your membership card in the “Society for the Preservation of Orthodox Steampunk”, dutifully countersigned by Jules Verne and Nikola Tesla, before passing judgement. To my mind, anyone who puts the effort into creating a steampunk outfit and props should be welcomed, whether they’re sporting an outfit made from altered thrift shop finds and a modded Nerf gun, or a full-out bespoke airpirate outfit and Tesla-coil-powered transmogrifier made in a professional machine shop.
So, relax, grab a brush, and get to it! You’re limited only by your imagination. I’d love to see pictures of your creations.

Reblogged this on The Obsession Engine and commented:
I’ve got a large box full of garage sale scores to do up, so this one’s timely!
LikeLike
Pingback: 18 Ridiculously Cool Custom Water Guns - Ceylinks
Pingback: What Steampunk means to me | Airship Flamel
Pingback: Halloween Steampunk DIY Costume Bits | Airship Flamel